
How do you refinish original shiplap walls in a 1940s house? I found a few online blog posts about the concept when I went searching, but nothing super helpful which I think is because the answer is, “It depends.” Here’s a few things that I think you need to be considered if you want to expose an original shiplap wall and then I’ll follow up with how we ended up doing it.
Firstly, what condition are the walls in? We have shiplap throughout our house, but in other rooms there were knot holes, age damage, and cutout sections that had been covered up. Additionally, if the shiplap is original, then it almost certainly has a thousand (or more) wallpaper nails/tacks in it from muslin wallpaper hanging. Due to the common shifting of the ground in our area, we also have gaps in between boards that probably weren’t there when the shiplap was installed. In the room that we exposed our shiplap in, there had been a door in the wall that had been boarded up, so we had to come up with a plan to manage that. In the kitchen, the walls had several odd, small holes that we ended up wallpapering over.

Next, how perfect do you want the shiplap to look? Are you going to be driven crazy by leftover wallpaper tacks/nails? What about specks of paint or nail holes? Part of this is going to depend on your plans for the shiplap. If it’s going to be natural wood, you can’t do much about the nail holes, but you could fill them if you’re planning to paint. My shiplap has paint all along the edges by the trim because they originally wallpapered over it, and the paint proved difficult to sand or take off without altering the tone of the wood more than I wanted. Likewise, I found it difficult to remove all of the wallpaper tacks without damaging the wood because of how closely they sit next to the wood surface.

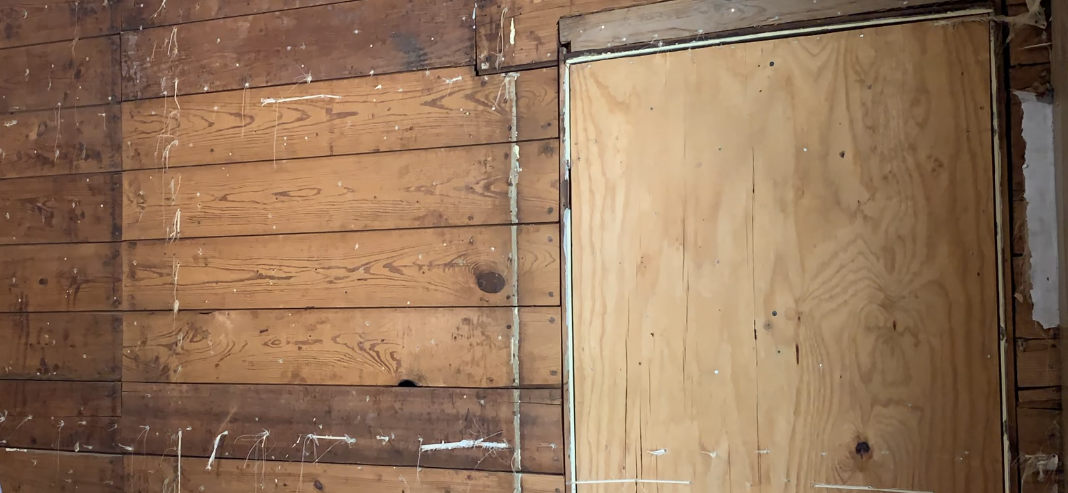
In this picture, you can see the paint on the bottom board and on the side where door trim would have set. They over painted the trim because it would have been covered at the time with wallpaper.
Last, but probably most important, how is exposing the shiplap going to affect your weather sealing and insulation? Additionally, how will the shiplap be affected by moisture? Old shiplap wasn’t meant be exposed – generally, it would have had wallpaper over it. Typically, there’s two sides of shiplap built on the house frame with an empty space in between the two layers of shiplap meant for running plumbing and electrical. Old houses weren’t built with insulation in the walls, and some people think that adding insulation in humid climates, like we live in, can risk trapping moisture and encouraging mold growth since old houses weren’t built with the expectation of air tightness. Old houses were actually built with the idea of encouraging airflow as much as possible since they were built before HVAC systems were commonly used. All that to say, these walls are not very good as keeping warm or cold air where you want it, so you’ll be losing some energy efficiency by exposing an original shiplap wall. As I said earlier, our shiplap walls have gaps between the boards due to the shifting ground and have no insulation, so I chose an interior wall to try to expose. Due to the energy concerns and concerns about moisture, I wouldn’t expose an exterior shiplap wall. I also picked a bedroom wall to limit the potential moisture exposure.
When we pulled the paneling and old wallpaper off the wall to look at the shiplap, I had two concerns about the wall that would have had me putting the paneling back on depending on the outcome. First, I wanted to see how bad the gaps were in the wall. Second, I was looking to see if there was any difficult to conceal damage to the shiplap. For the most part, the shiplap was beautiful – few gaps, no major damage, and a beautiful color – but I nearly despaired when we saw the huge piece of plywood covering an old doorway. We didn’t want to re-add a door to that spot, and it would be incredible difficult and somewhat beyond our skills to patch in the shiplap there (plus, the wood would never match in color anyway) – so we were briefly stumped.
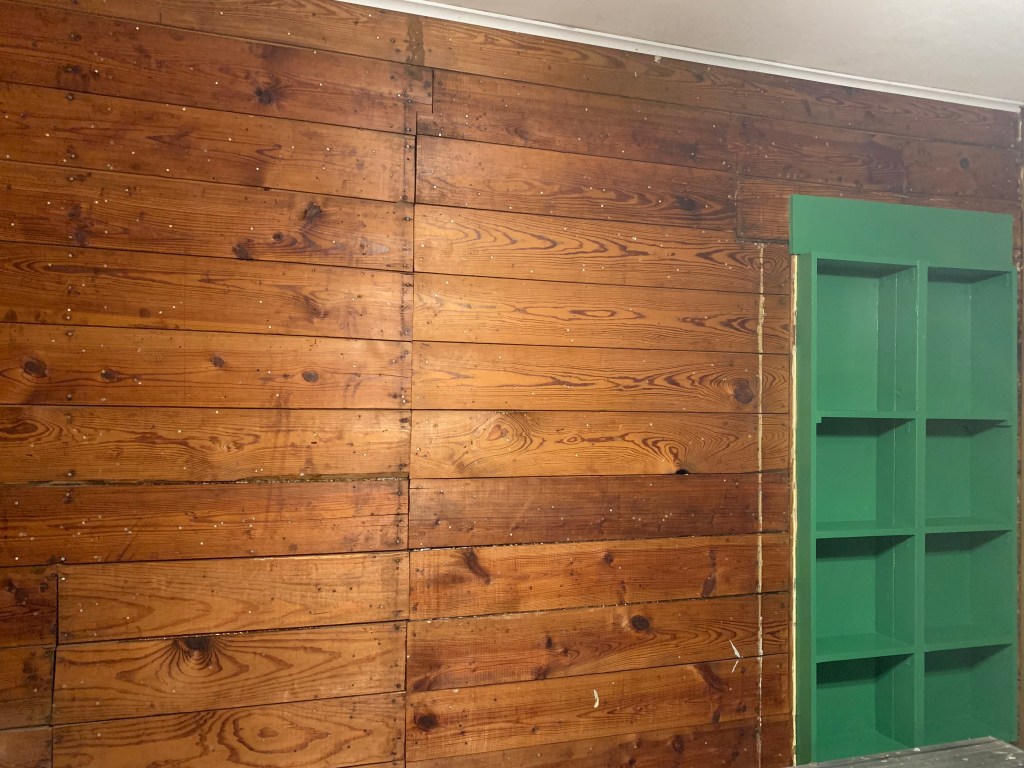
But, luckily, we knew of a house that had come up with a solution for filling in an old doorway – add a bookshelf! My mom’s house has a built in bookcase that’s, very clearly, set into a former doorway. So, why not do the same thing in our house so that we can expose the shiplap without having the patch in the doorway hole? So, my husband built the wood frame, and then I caulked and painted. It’s narrow, but will hold an average paperback if we decide to put those on there.
For the shiplap itself, it was a multiple step process. After pull the wallpaper off, I went across it with scissors and pliers to pull off the remaining muslin/linen from the wallpaper. The last little strings were snipped with wire cutters or burned with a lighter (just – be careful with fire) Along the way, I also used a hammer and wire cutters to remove nails and wallpaper tacks. I found wire cutters very helpful with the tacks because the tacks aren’t driven in deep or hard – they’re just difficult to get a hold of. Even still, there’s a lot of tacks left in my wall that I couldn’t remove without damaging the wood.
After the wallpaper scraps were removed, I sanded with 110 grit using a palm sander – I didn’t want to sand the walls too much because I liked the aged color, but I wanted to smooth down some rough spots. I tore up several sheets of sandpaper in the process because of the remaining wallpaper tacks I couldn’t get out. After sanding, I washed the walls down with Murphy’s oil distilled in water. Once dry, I took clear caulk to the gaps to help seal the wall better. The clear caulk isn’t my favorite thing, but I wanted to seal the gaps without altering the look of the wood too much. If I had been planning on painting, I probably would have caulked more though since the paint would hide it better.
Finally, once the caulk was dry, it was time to decide on a finish. I didn’t want a shiny finish and I wanted to keep the color as close to what it was as possible, so I ended up choosing to use linseed oil on the shiplap. It darkened the color, but not by too much. Most instructions say to use multiple coats of linseed oil for the best protection, but I only used one because 1. I could feel the slight protective finish after one coat, 2. I didn’t want the color to darken even more, and 3. there’s not a big need for a protective coating on this wall.

Is this the best, most proper way to refinish an old shiplap wall? I couldn’t tell you for sure, but my guess is probably not. But, it’s a way to refinish a shiplap wall and time will tell how well it holds up in our house. I’ll probably re-apply the linseed oil in a few years since it wears down over time, and I might need to revisit the cracks and gaps are some point. Otherwise, I love how it looks and I’m glad we experimented with showing off our original shiplap!
View our instagram reel about this room below!
