
I’m going to try to take you on a journey through our bathroom renovation, but it’s been a long journey full of stops and starts so please forgive me if I forget things along the way. We made mistakes, we did things improperly sometimes, and we had to make corrections – we are human after all. My husband also handling the tiling and shower for the most part, and I couldn’t really describe to you want exactly he did except that it turned out nicely.
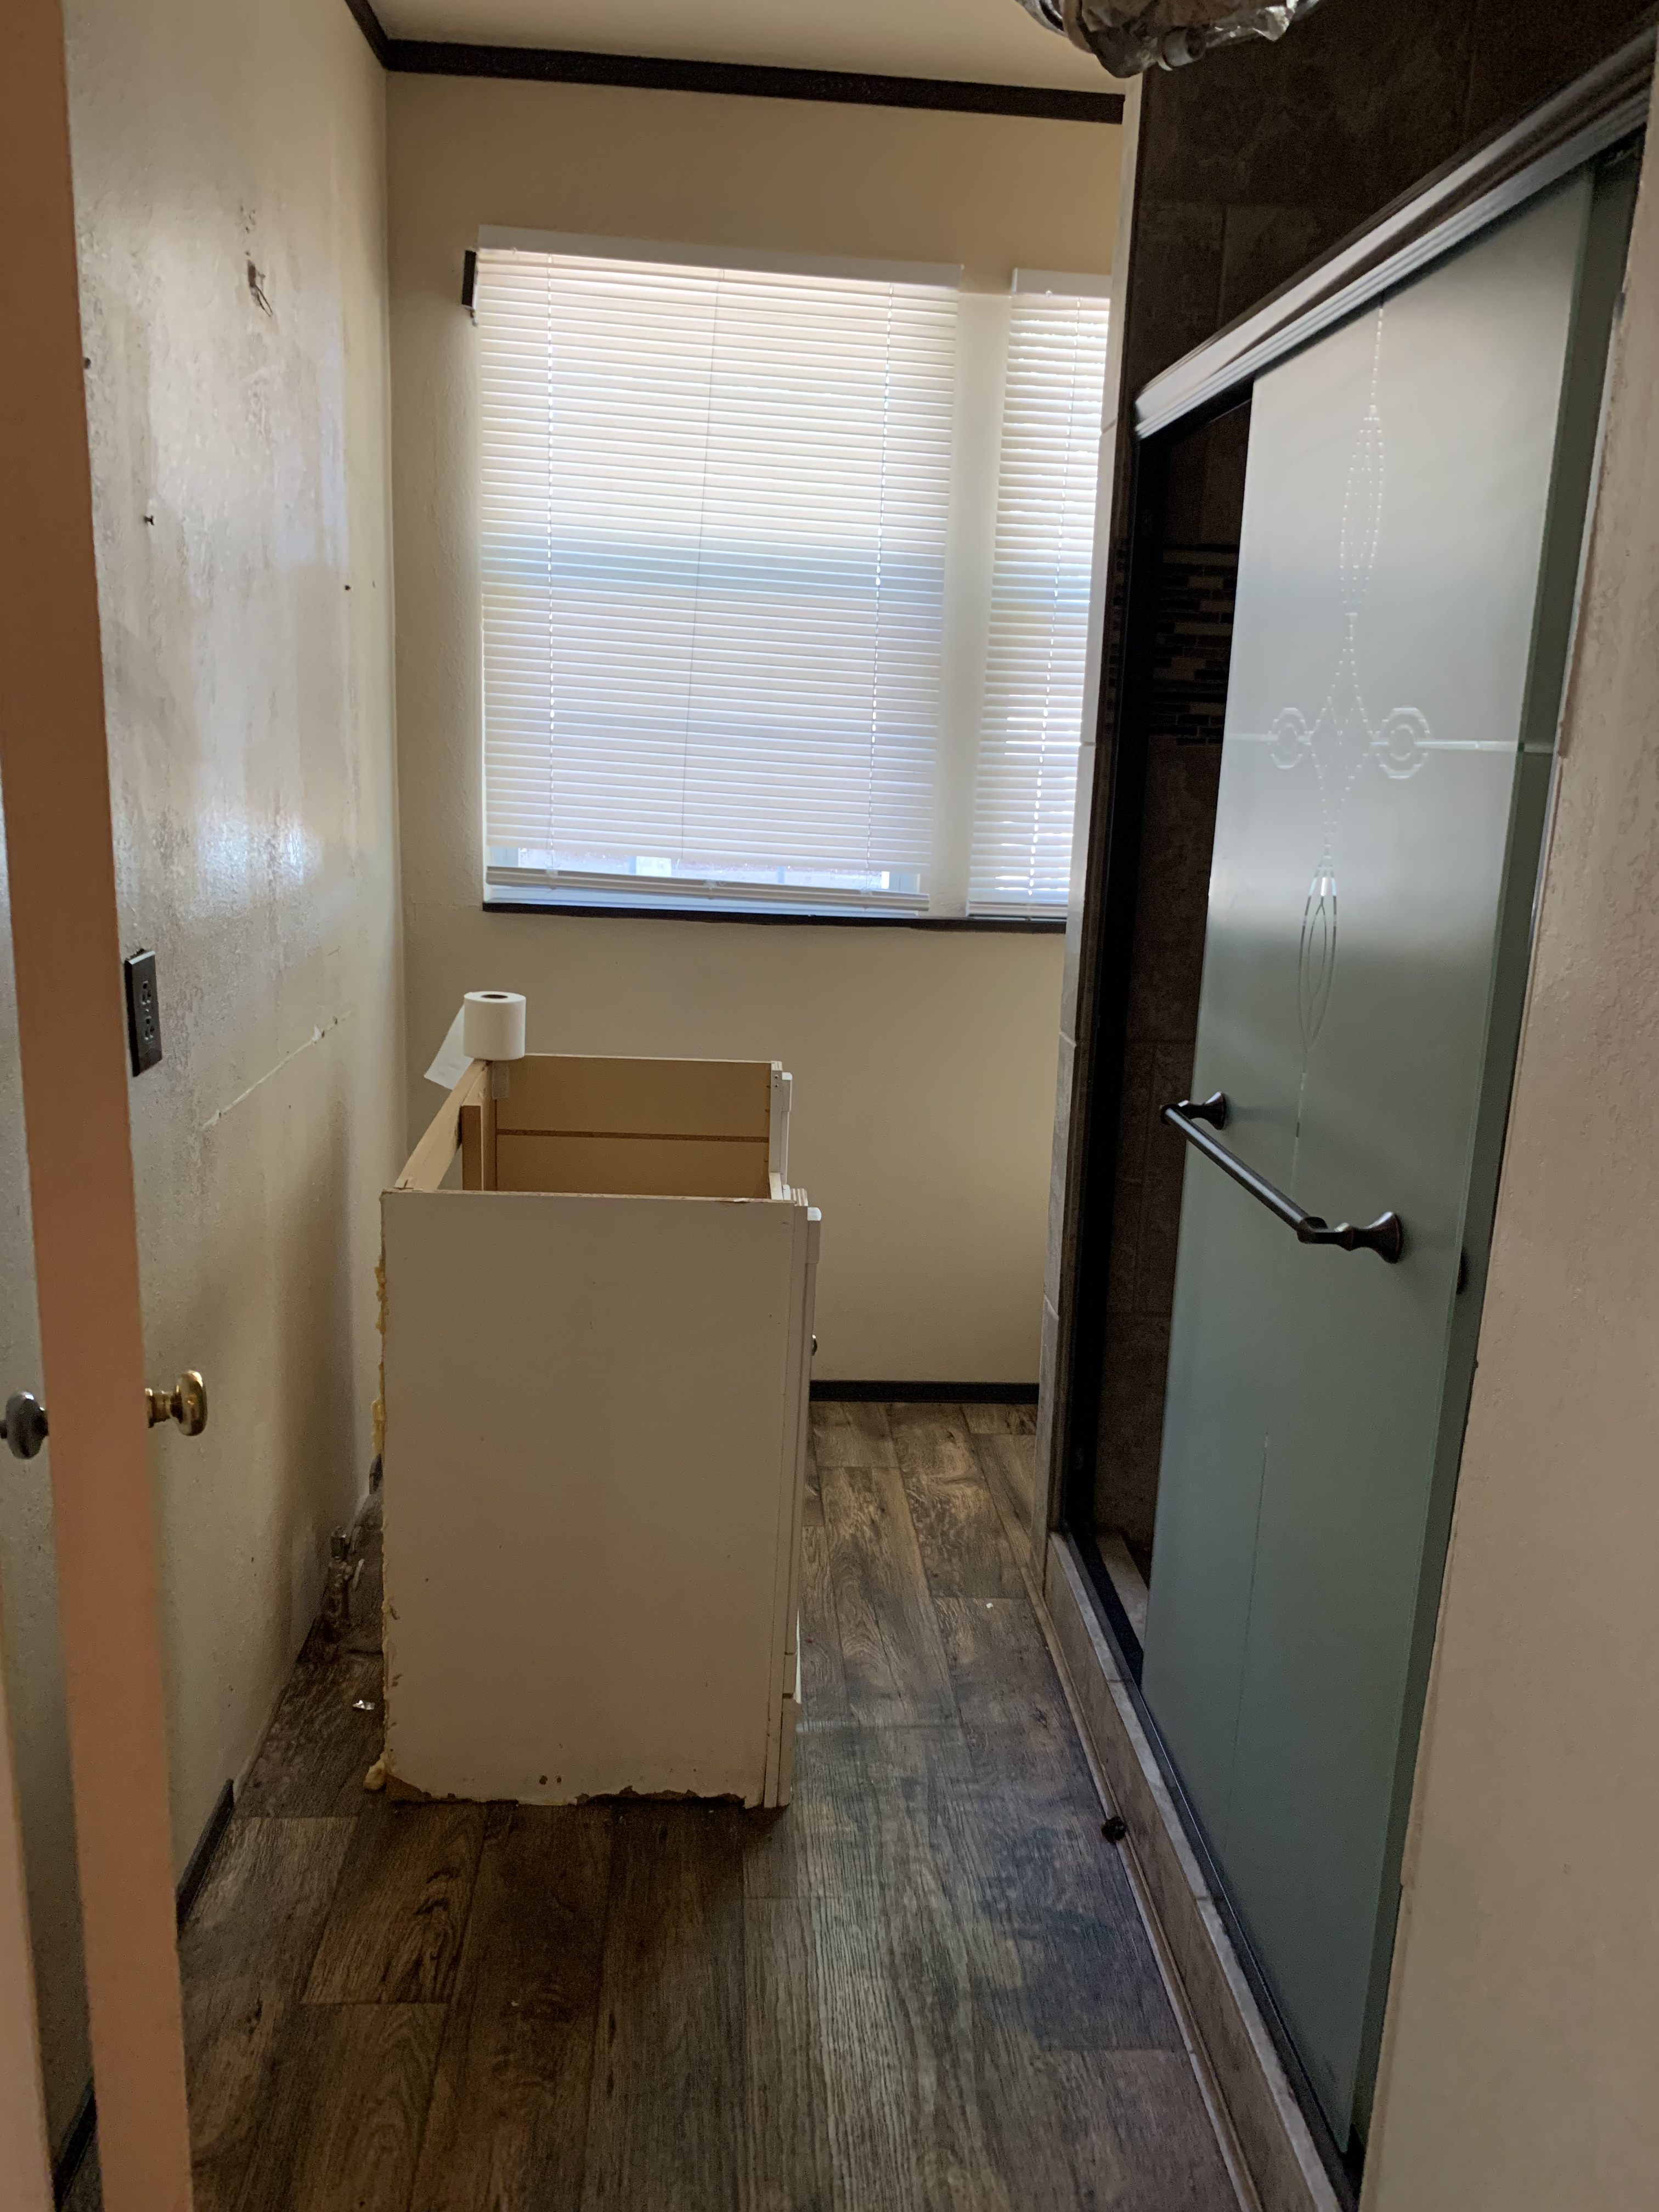
We’ll start at the very beginning, a very good place to start, in August of 2022. We’ve just purchased a fixer-upper house, our first house, and we’re figuring out what to prioritize and how to get started. We put this bathroom near the bottom of the list – originally, because we thought it was in pretty good shape and later because we realize the shower is in very poor shape. There’s a fabulous glass sliding shower door that does very well at tricking the mind into thinking that the bathroom is very nice. We see the shower door in all its glass glory, and don’t see the poor tiling in the shower or the tell-tell scum on the floor.
The bathroom has been half renovated – the wood paneling present throughout the house has been replaced with textured drywall, the shower is tiled and modern, the vanity has been removed (but left in the room), and the sink with its plumbing is missing (to be found outside eventually). The walls are a sad beige and the flooring is a vinyl sheet printed to look like wood. There are supports for floating shelves behind the toilet, but no shelves. The hookups for the sink waterline were left slightly open causing a drip to bubble up and ruin the surrounding flooring – we discovered this during our inspection period and helpfully tightened the knob for the sellers. We’ll eventually figure out that there’s something off with the shower tiling, but that discovery is months away.

In fall of 2022, we get our house re-wired and add some additional lights to the bathroom. In that process, we’ll figure out patching drywall (but didn’t bother to figure out how to re-texture it). We developed a system – my husband would get the pieces in place and I would handle the mudding. We’re pretty lucky to have lots of wooden supports to screw into, but he would add wood backings where needed to attach the drywall. The method I found that worked best and looked the best for mudding was to apply a layer of mud, then drywall tape, then mud again. I would let this dry, then lightly sand, and apply another layer of mud. If the gaps were narrow enough, I would try skipping the tape. I think I was using a thicker tape than was ideal for patching, but I stuck with using what I had.
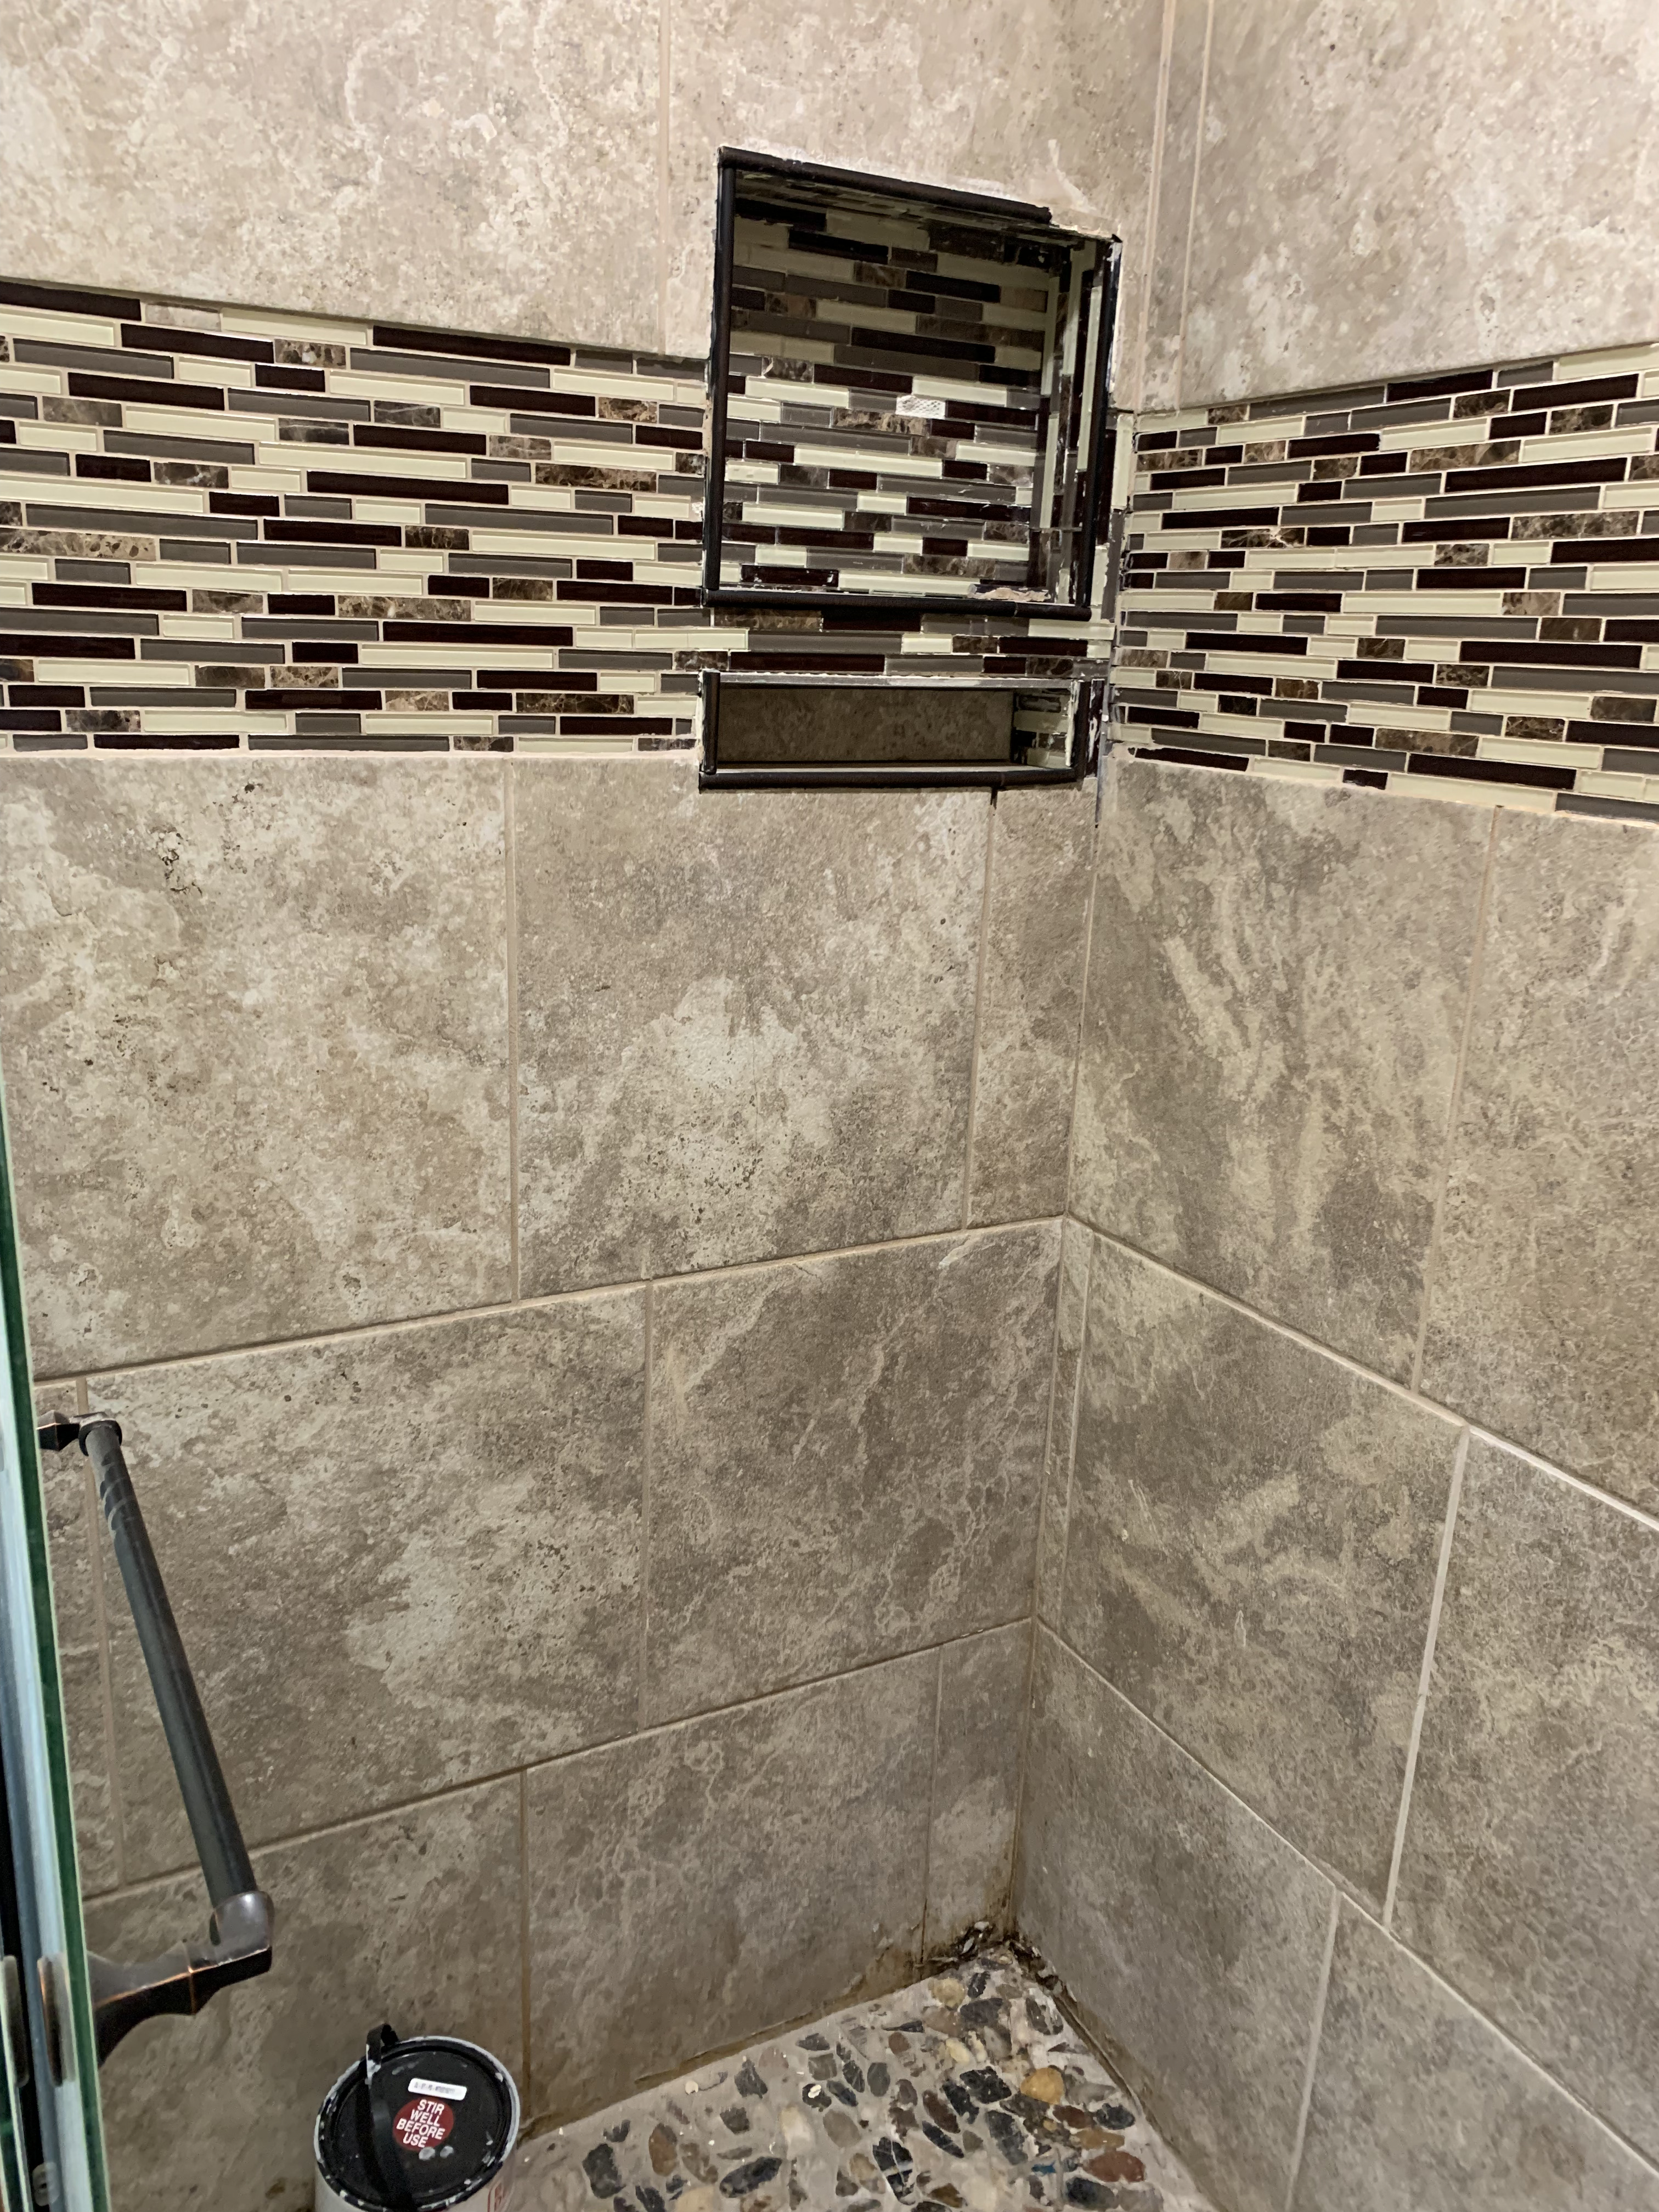
Around this time, I started (but didn’t finish) painting the bathroom grey with leftover paint from the dining room and we ripped out the vinyl sheet flooring. Thanks to the moisture, it had grown molding and was thrown away promptly. After that, we didn’t work much on this bathroom after a while. We discovered that the shower floor tile had been installed improperly. The tile was meant to be river rock, but there were glops of what seemed to be cement stuck on top that were extremely difficult to remove. We made attempts at scraping the cement off with no real luck. Later, we learned that portions of the tile had indeed been stuck directly in cement. In the corner of the shower was also a shower cubby, but the tiling was incomplete and the corner left with cement board exposed. As if someone had ambitiously decided to add this cubby, realized that it would be difficult, and decided to slap it together instead of scrapping the plan.
So we entered in 2023 with more problems found in the bathroom and few solved so far. At this point, we were almost ready to move into the house but one of the things lacking was a functional bathroom so we made a game out of it. We have two bathrooms – this modern one and a vintage one. My husband had early on claimed this one as his bathroom and I took on claiming the vintage one as mine, so we started a challenge to race to see who could finish their bathroom first – spoiler, but I won. Landon finished most of the painting in this bathroom though, and took on the task of tiling the floor. I don’t remember where they had come from, but we had acquired some square white tiles which he used on the floor in there. After the tiling is finished in February of 2023, my photo library goes dark on what, if anything, we did in renovating the bathroom.
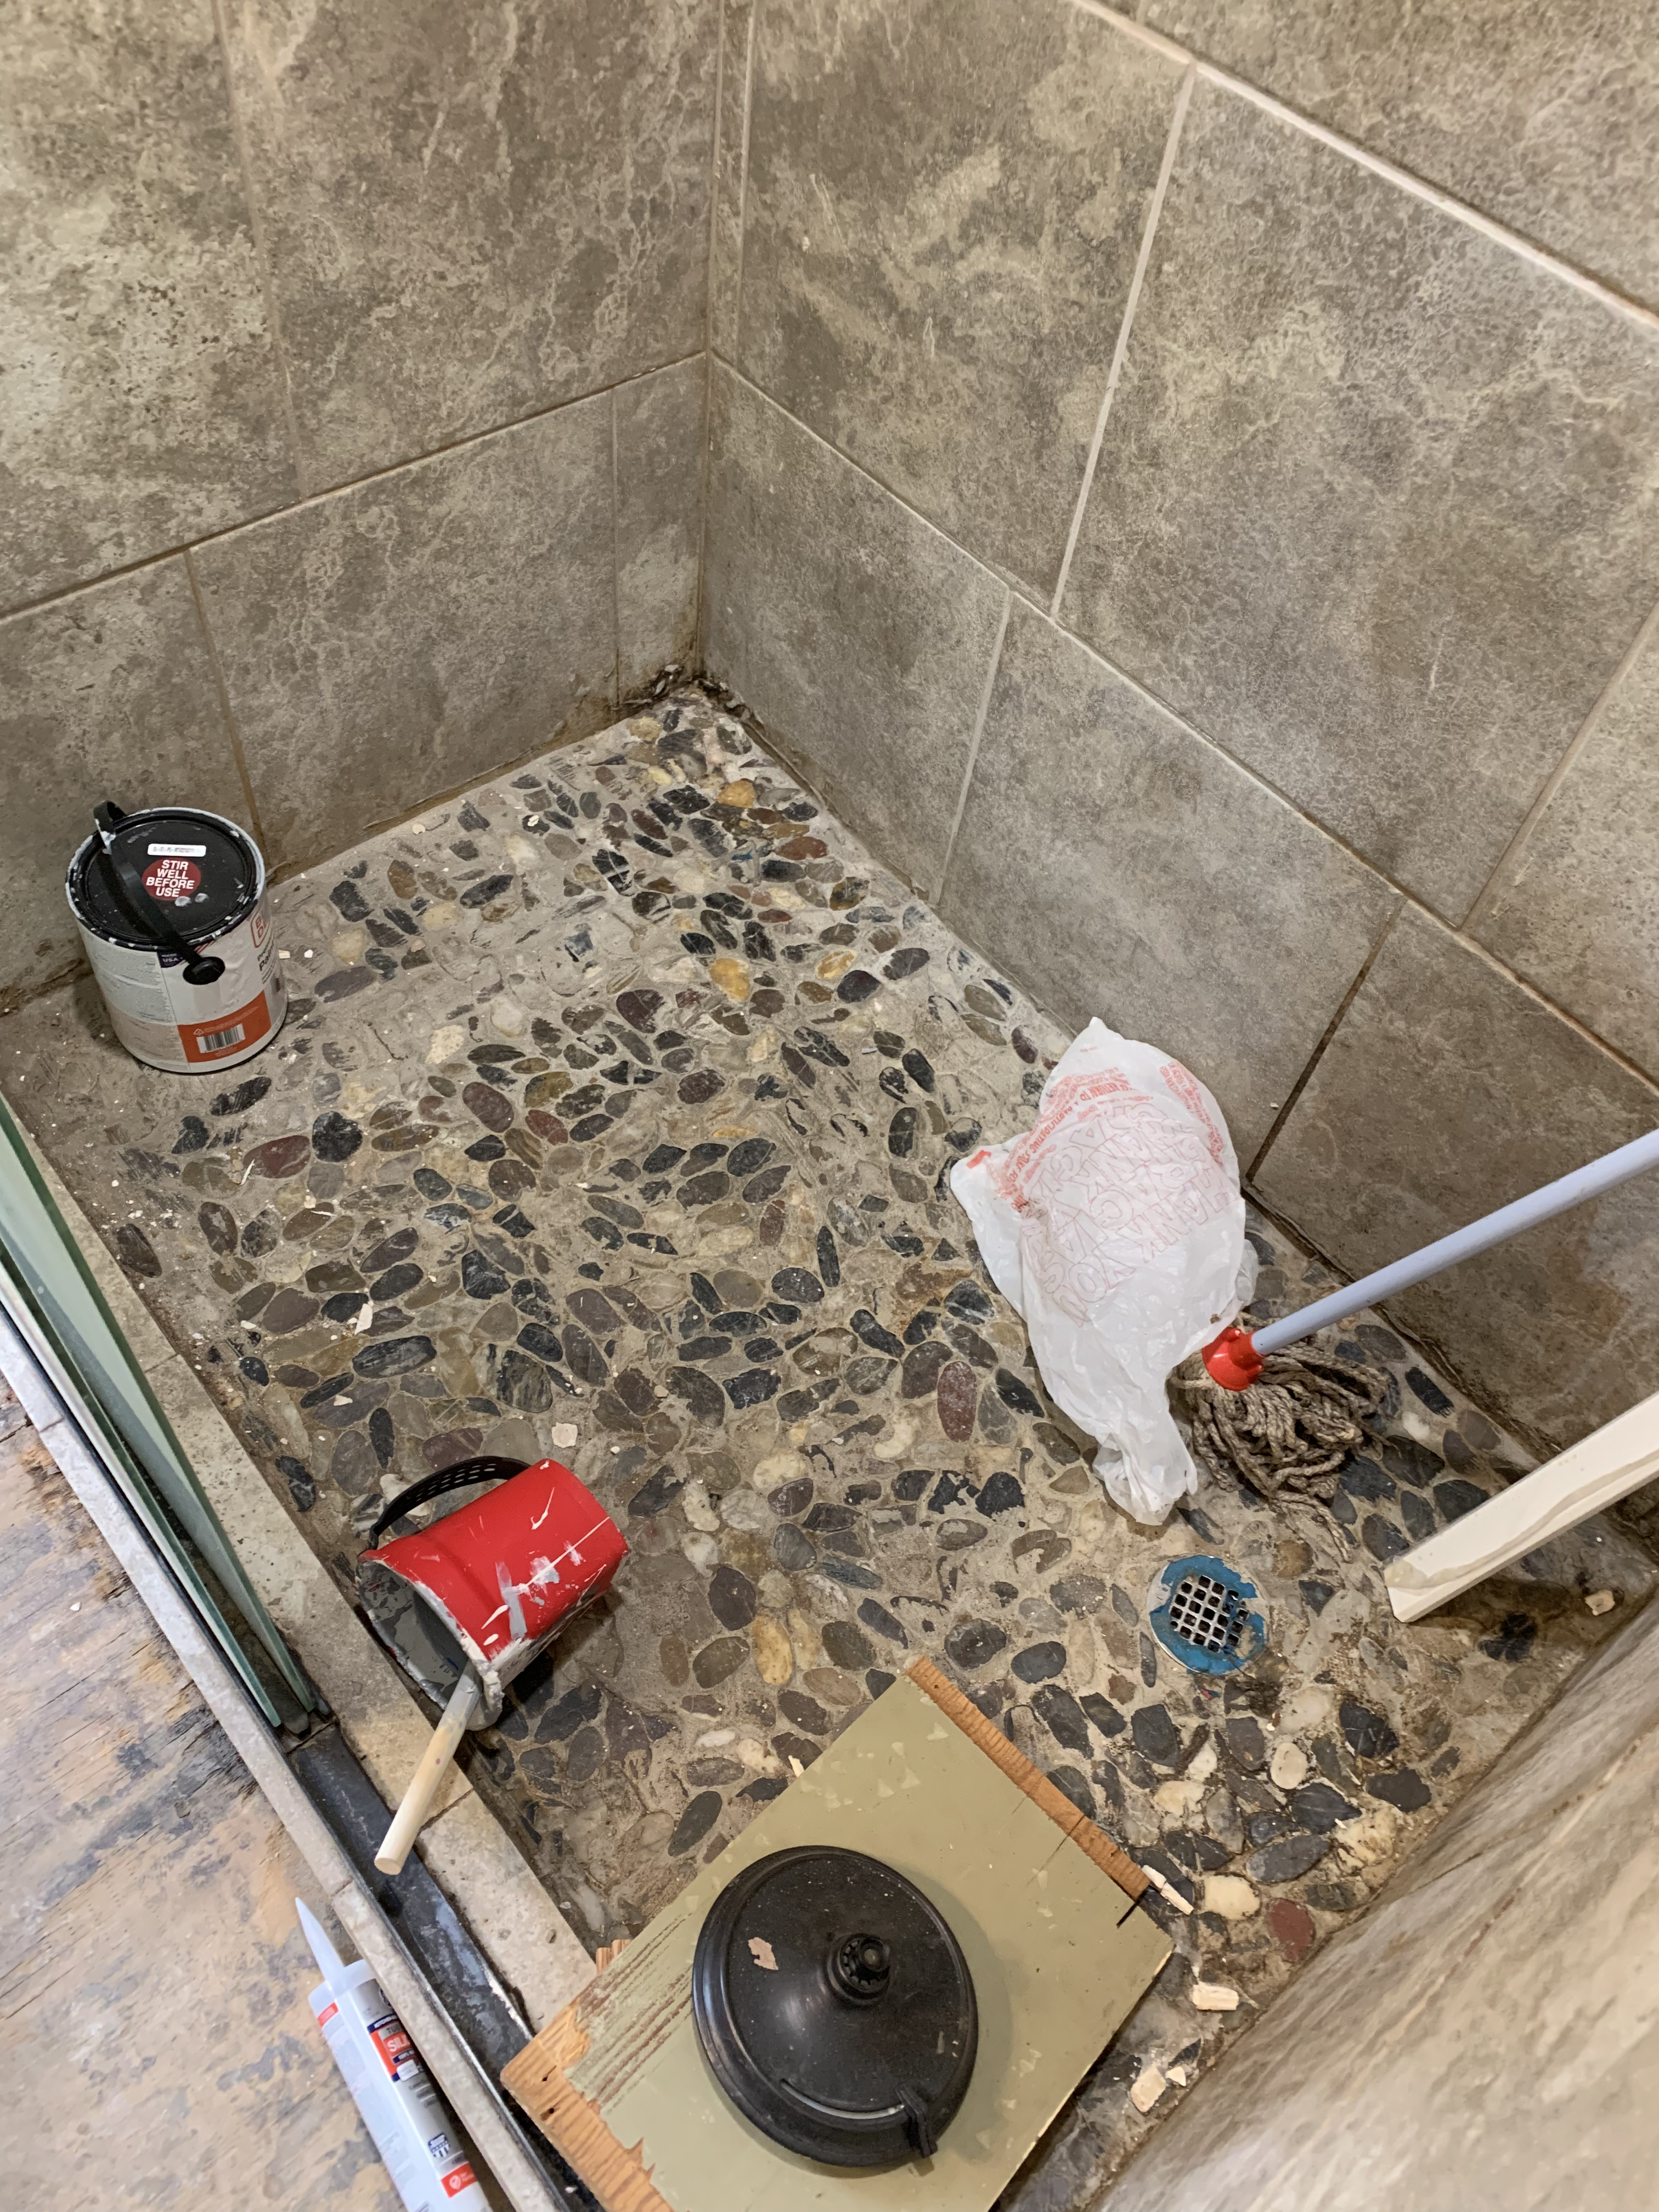
We moved in in March of 2023, and the focus shifted to other rooms and other projects for a while until January of 2024. It’s then that we started focusing on the bathroom in earnest to finally get it done and usable. First, we had gained a strong superstition about the quality of the tile work and whether it was properly done and watertight. So we blocked the drain and turned on the shower while Landon went under the house to observe – we did not expect the result! Water was pouring in the crawlspace through the edge between the shower lip and the pan.
At all.
Water was also found in the closet behind the shower. Information gained, we decided the next step was ripping out the current shower floor/pan. We carefully took out the shower sliding door and stored it in the guest room to be re-installed later (and somehow lost the screws despite my clear memory of putting them in a bag taped to the door – I digress). Next up, demolition. Starting with the shower lip, I took my crowbar and hammer to the tile which popped over pretty easily. Underneath, I found that the shower lip had been made of tile on top of cement board on top of three 2×4 boards – no waterproofing and nothing sealing the corner between the shower pan and the lip. The boards had obviously been exposed to a lot of moisture and were mostly mold at this point. This all came out easily – although I do recommend not tiling the floor before you demo the shower. Some damage was done to floor despite my efforts.
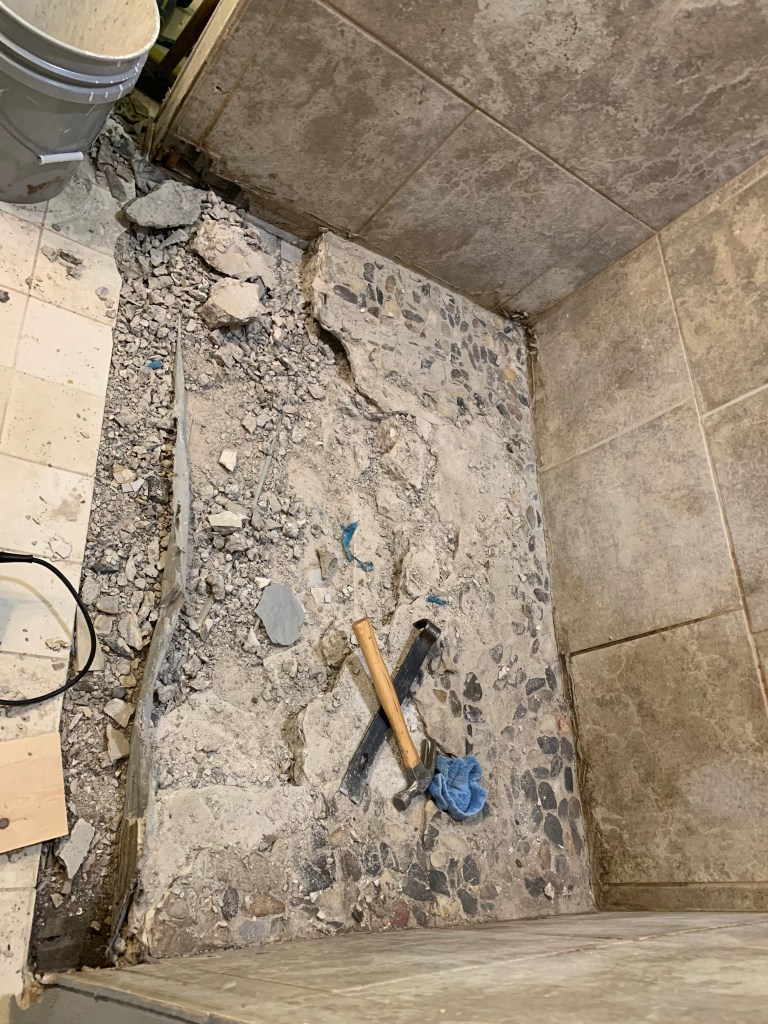
Next was time to demo the shower pan. It was river rock tile set into mortar or cement (it varied through the floor for some reason) with a cement poured shower pan with a waterproof liner underneath. The bottom of the pan was often loose gravel/fine cement dust? I’m likely not used the proper terms as I didn’t need to know them to demo the pan. At first, I tried hand tools – a crowbar, a hammer, a sledge hammer, and so on. I didn’t like using the sledge hammer directly down on the shower pan because I was worried that the force would cause the wooden supports to crack or break – we have an old pier and beam house after all. These methods weren’t really making much progress so I started looking for other methods and discovered the rotary hammer drill – this thing was beauty! It tore through the tile and made quick work of breaking up the cement. The best method was getting Landon to sledge the cement a few times to start cracks, and then I would use the drill to break those cracks up into movable pieces. Two days of evening work later, and the shower pan was no more! After this, I removed the poorly installed tiles in the shower cubby as well. These mostly popped off with a hammer and a scraper, but the glass tiles were inclined to fling pieces at me.
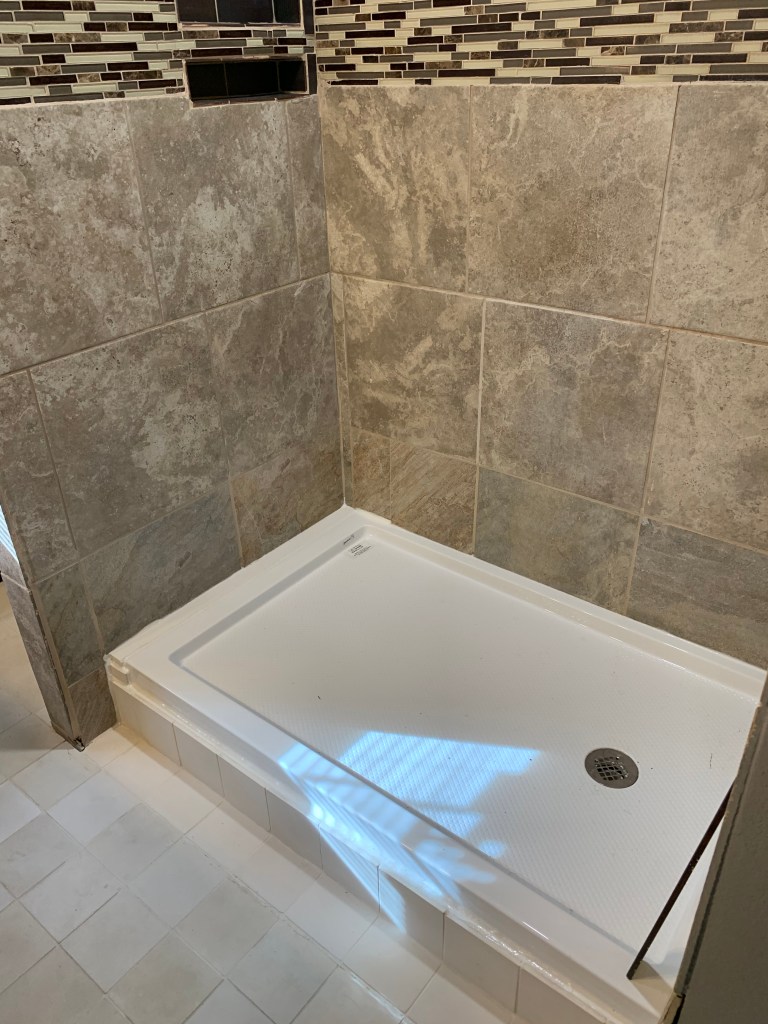
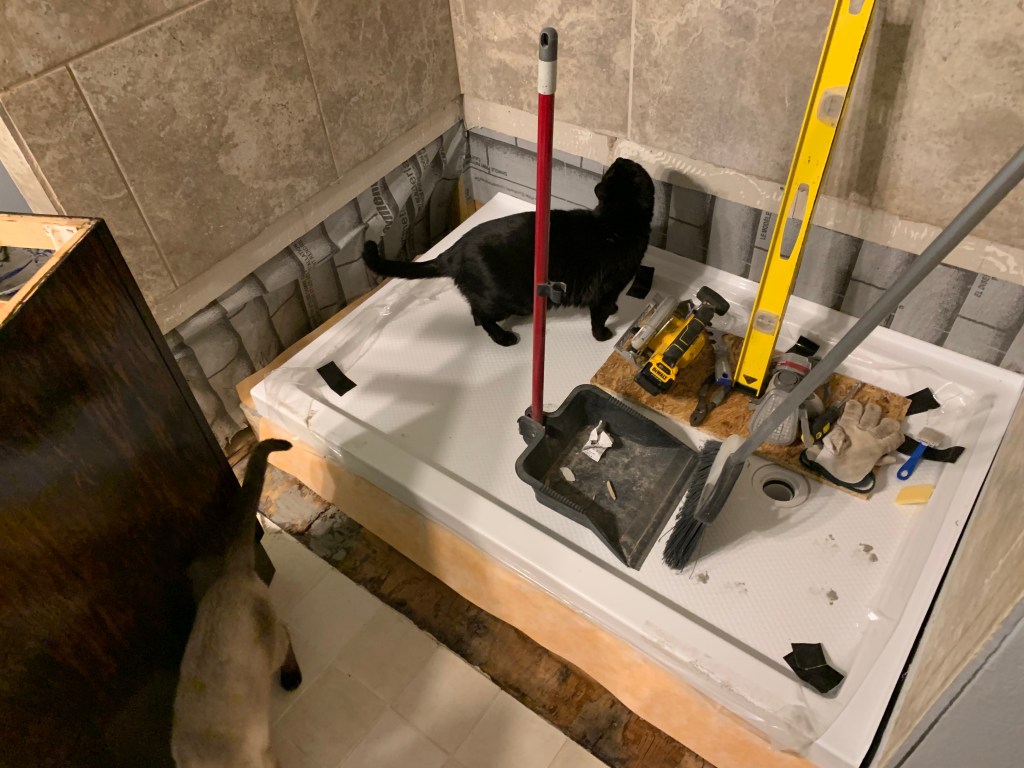
Following this, Landon and I are working on parallel projects. He worked on the new shower pan and its associated projects, while I worked on the sink and vanity. He decided to go with a pre-fab shower pan, but ran into some issues because we don’t have a standard size shower area. To make it standard, we would have to move walls, which we weren’t doing, so we had to get creative. We got the closest shower pan size we could find without going too big – the new shower is not as wide as the original now and we had an inch gap on the far wall. In process, we also learned that the drain is off center. Unfortunately, where it needed to be was right where a joist under the house runs. So, we got creative. Landon raised the shower up enough to run the plumbing on top of the subfloor so the drain could be positioned correctly for the shower. He build a base for the shower to rest on and mortared the shower pan into place. In order to properly waterproof the shower and install the pan, he also removed the bottom row of tiles because the lip of the pan is meant to rest under the tile.
After the pan was installed, he did the waterproofing and installed new tile that mimicked the original – we couldn’t find the original tile in stores and the ones we pulled off would have been too difficult to re-use. He installed a stone threshold that I had found at a ReStore a while back for $3 to cover the gap at the far edge – it was like it was meant to be. The threshold was the prefect size with no cutting required. Once the shower was set, he patched in the floor tiles with more of the white square tiles and took them up the shower platform. He had also fixed the shower cubby with some spare black ceramic tiles we had.
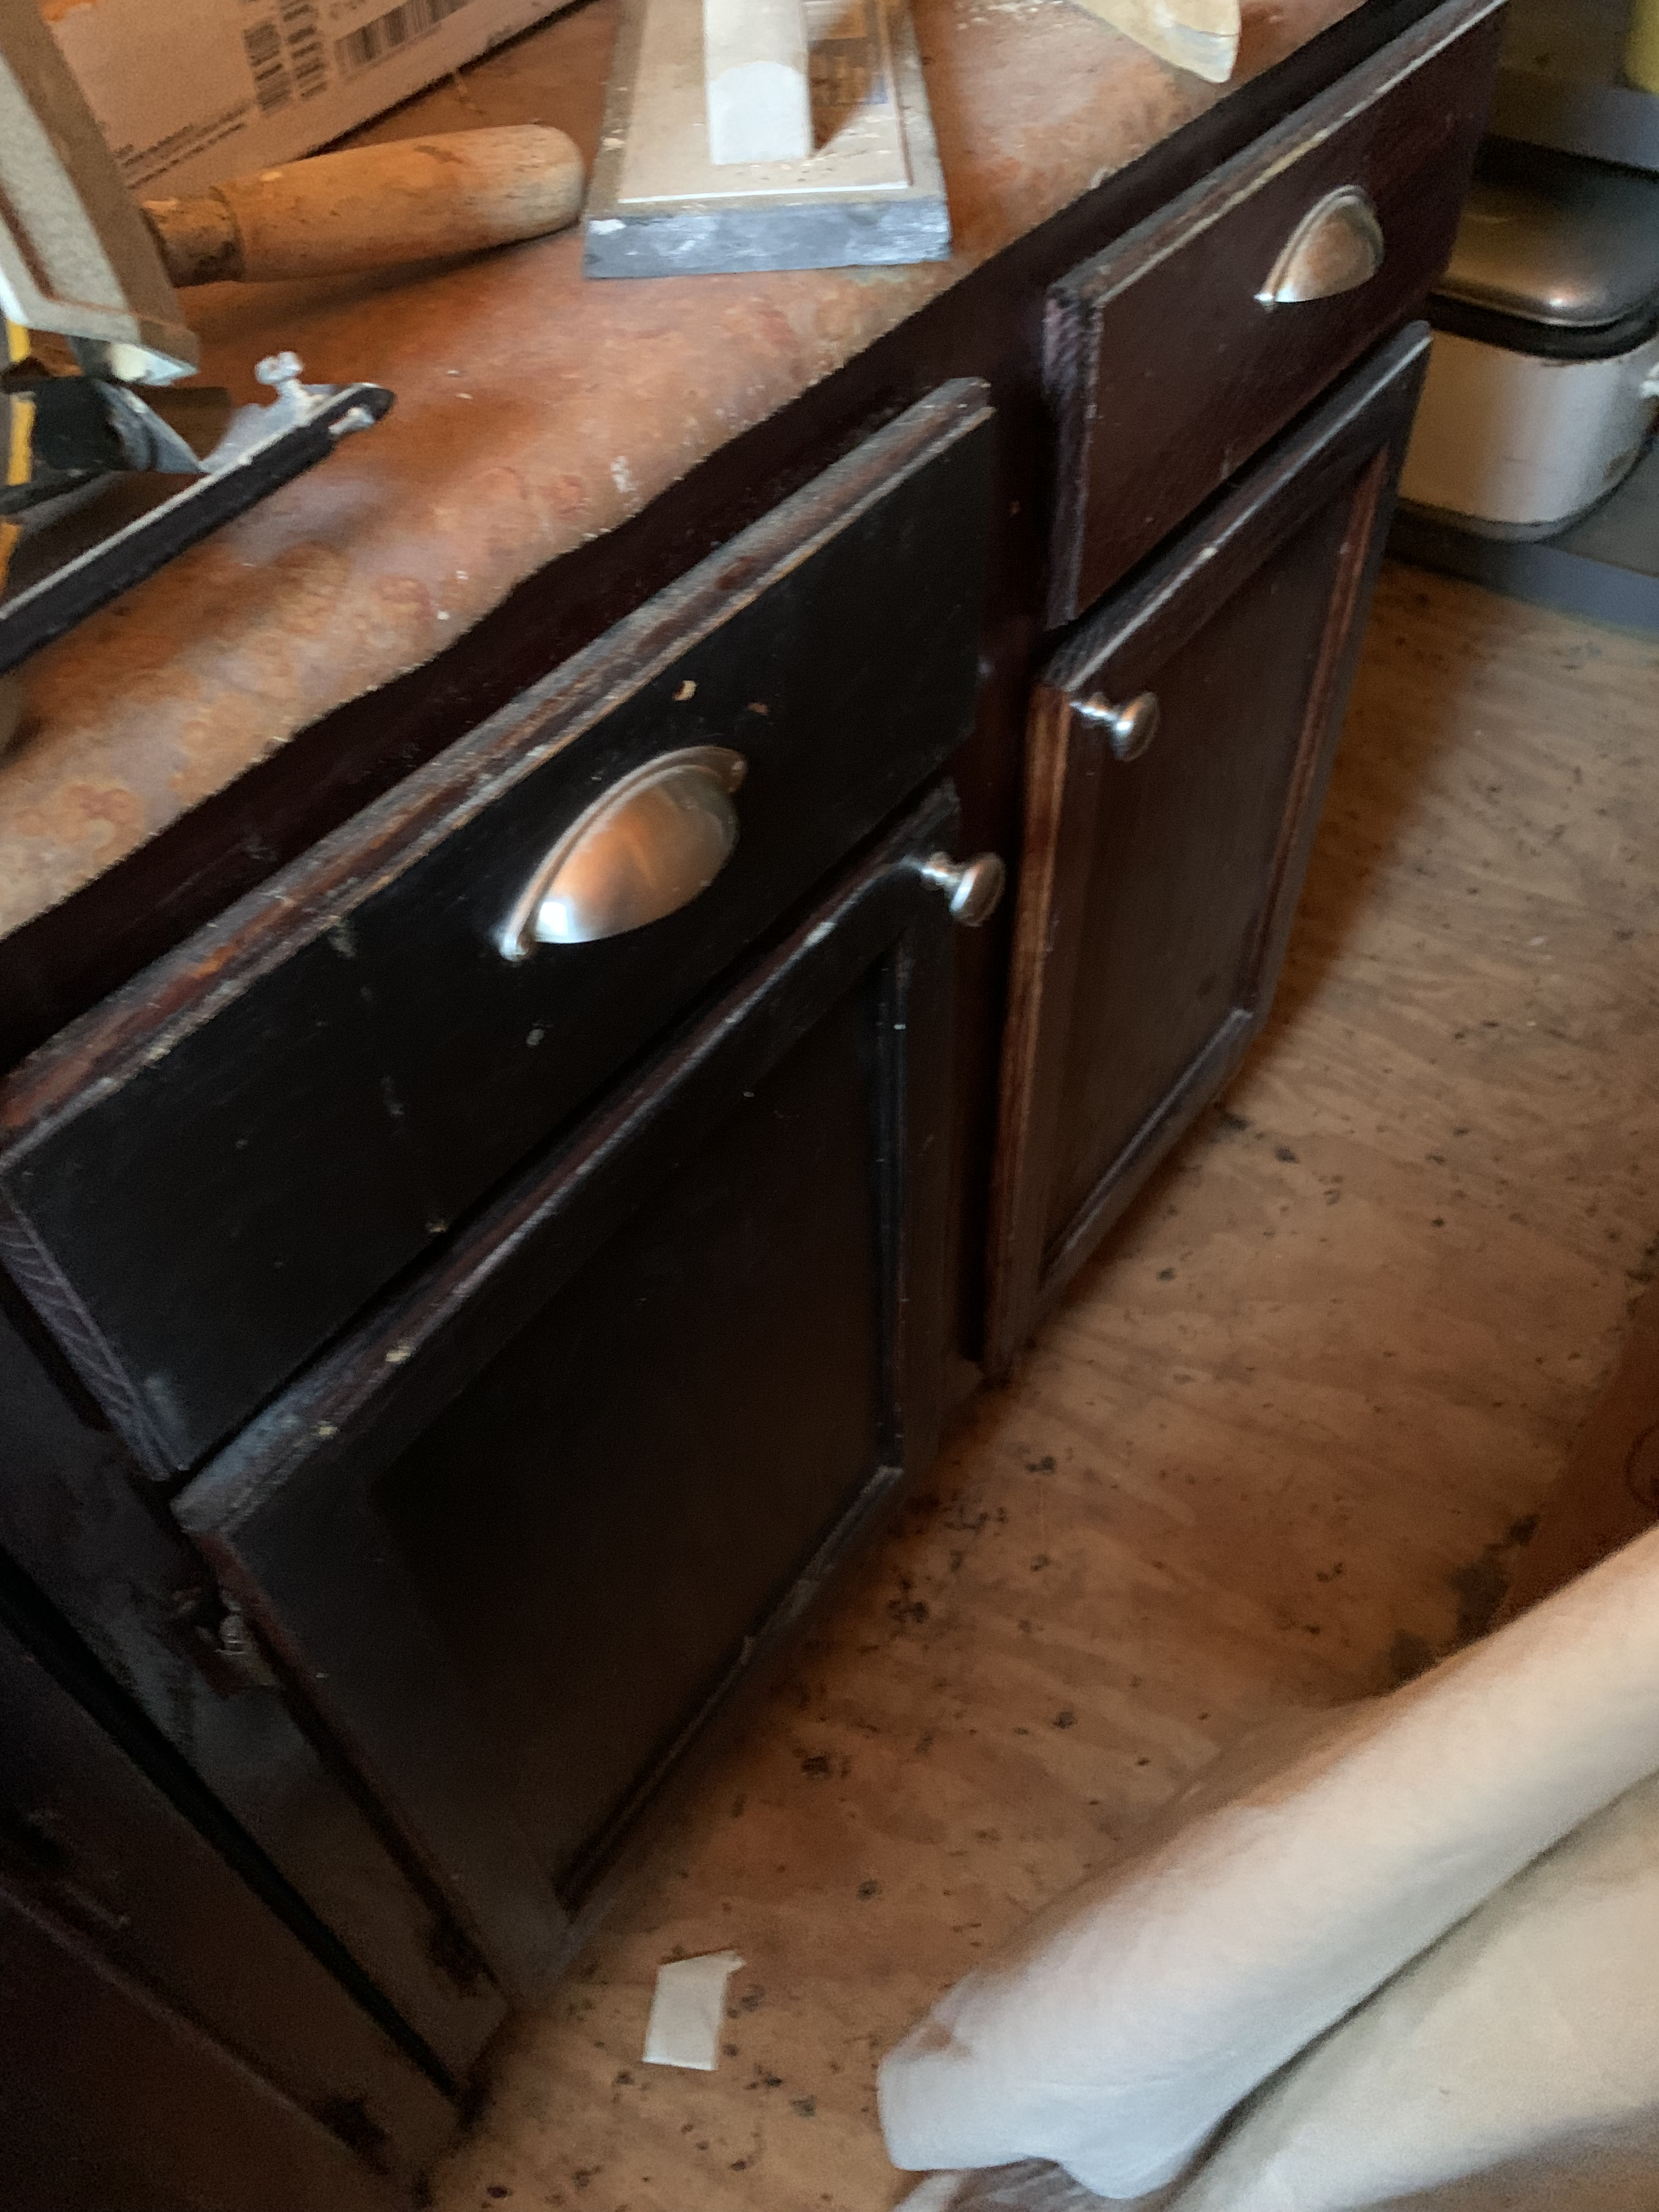
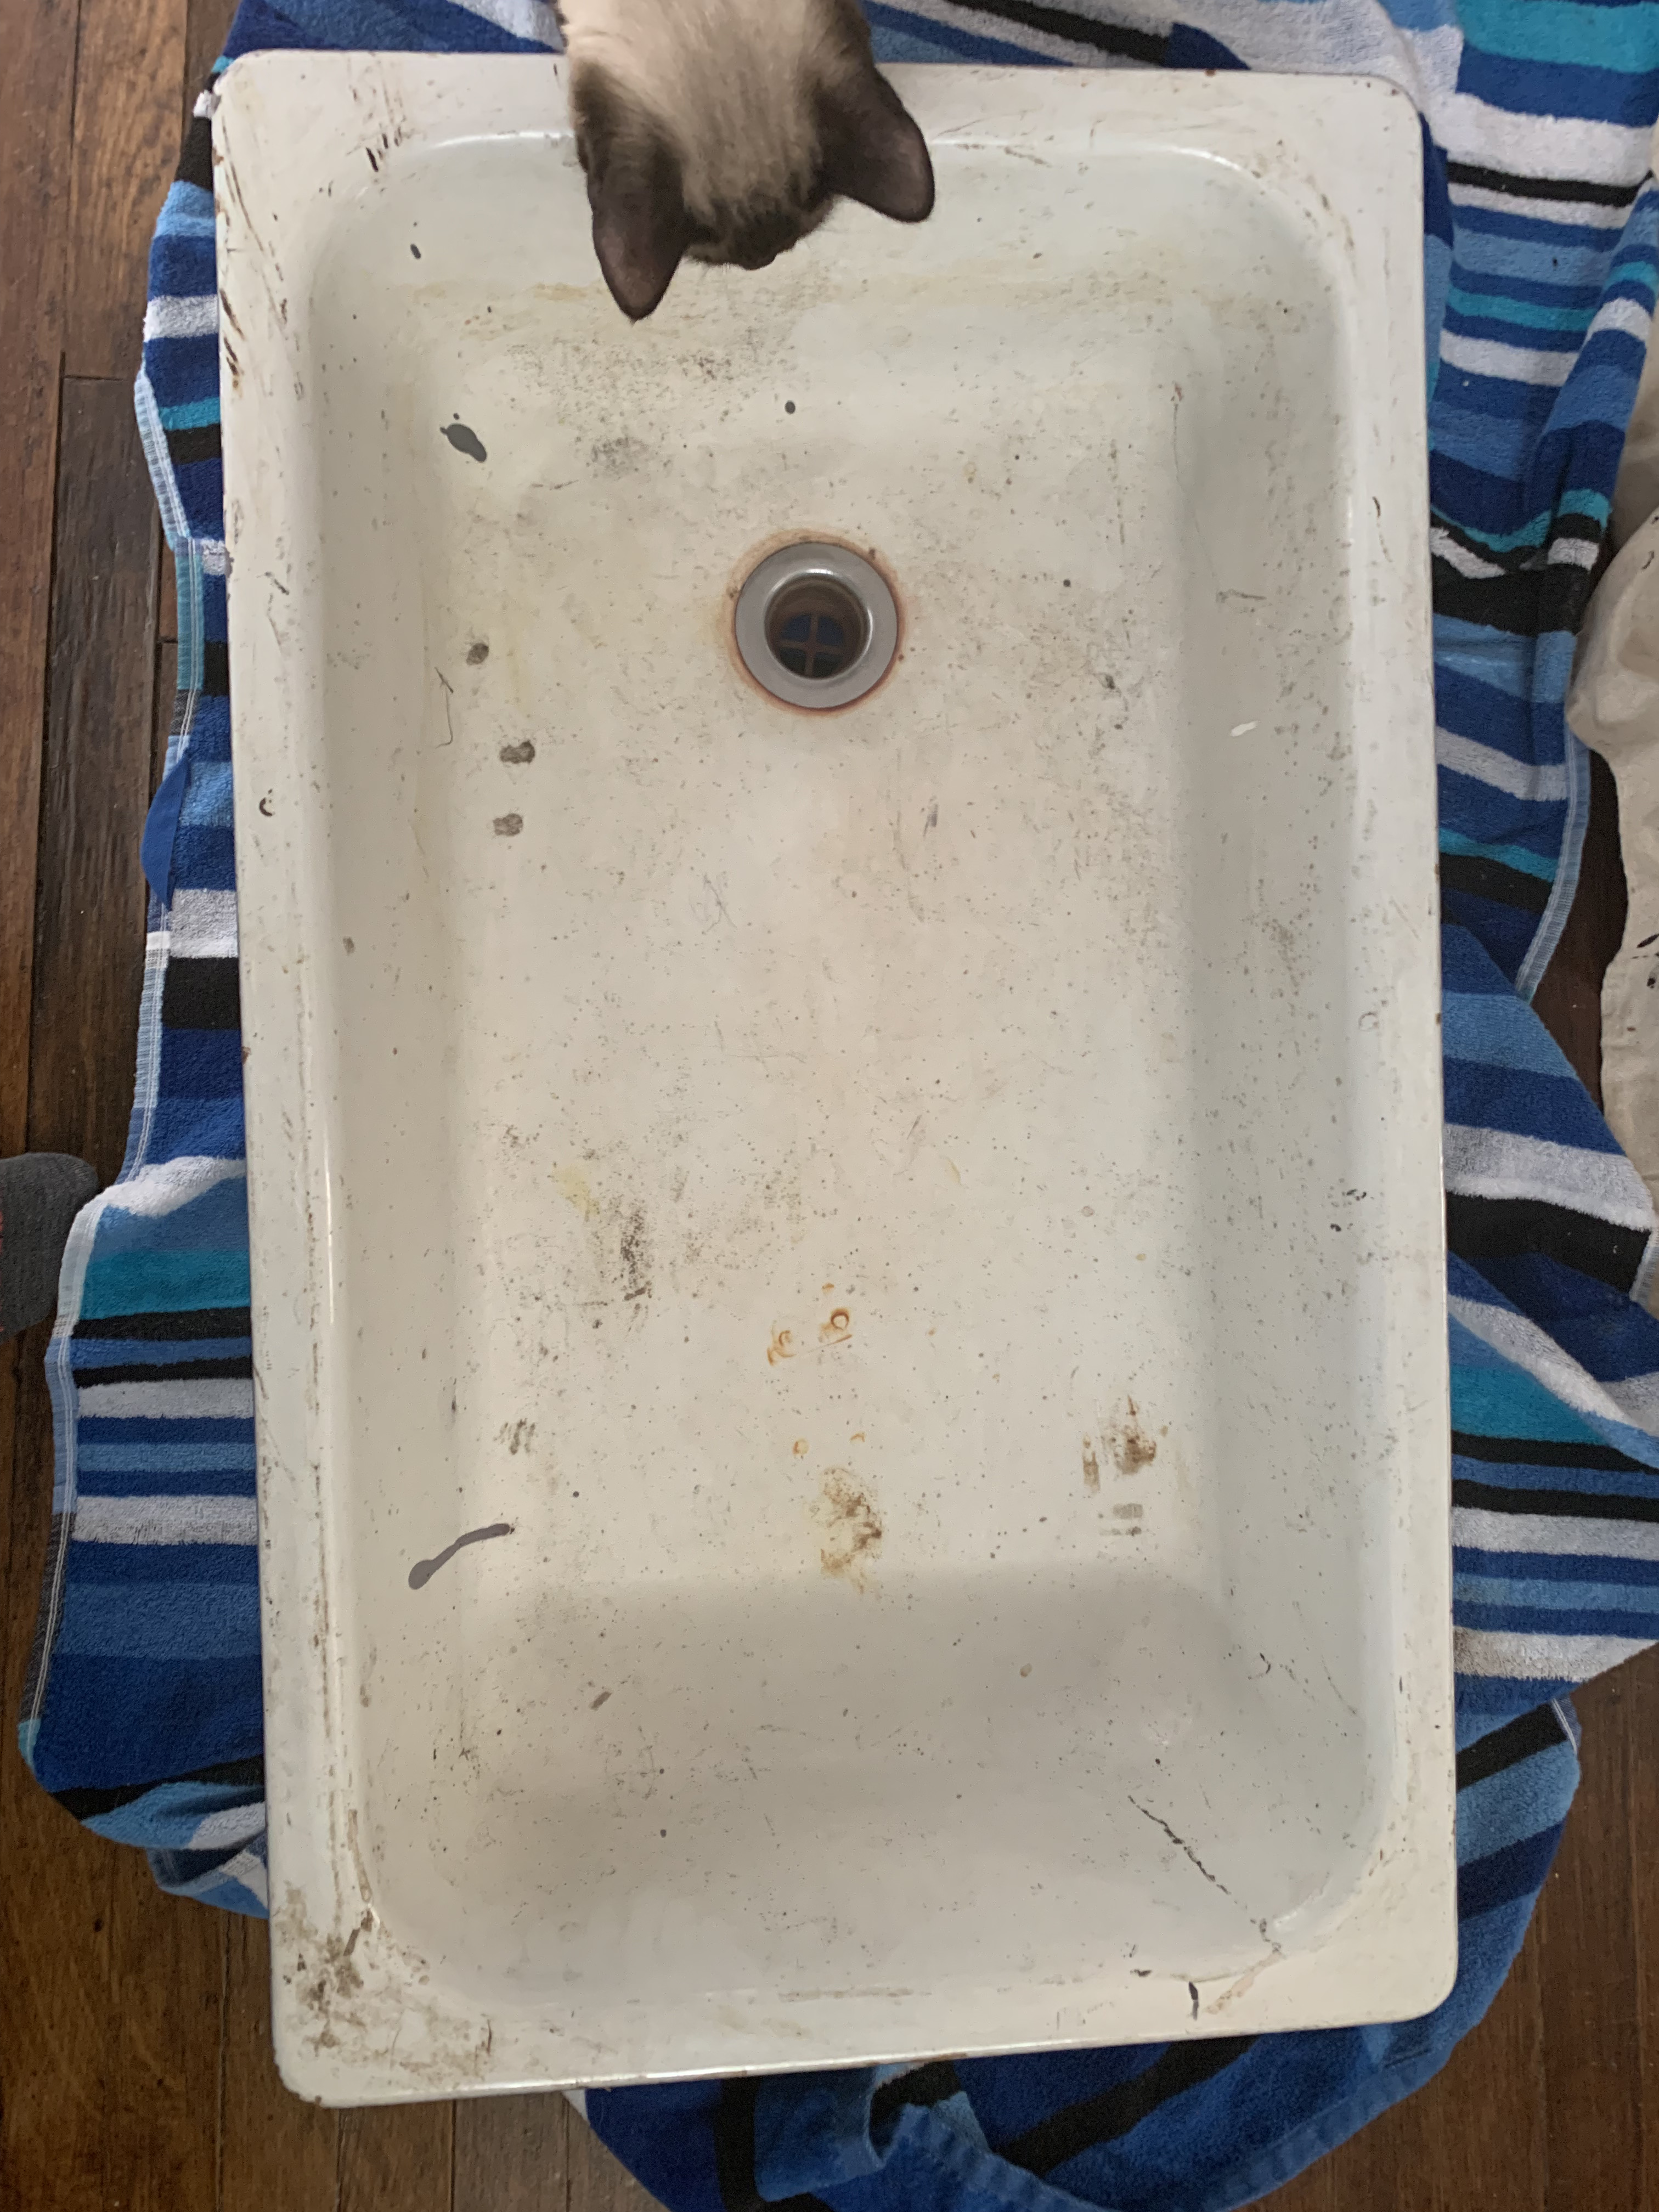
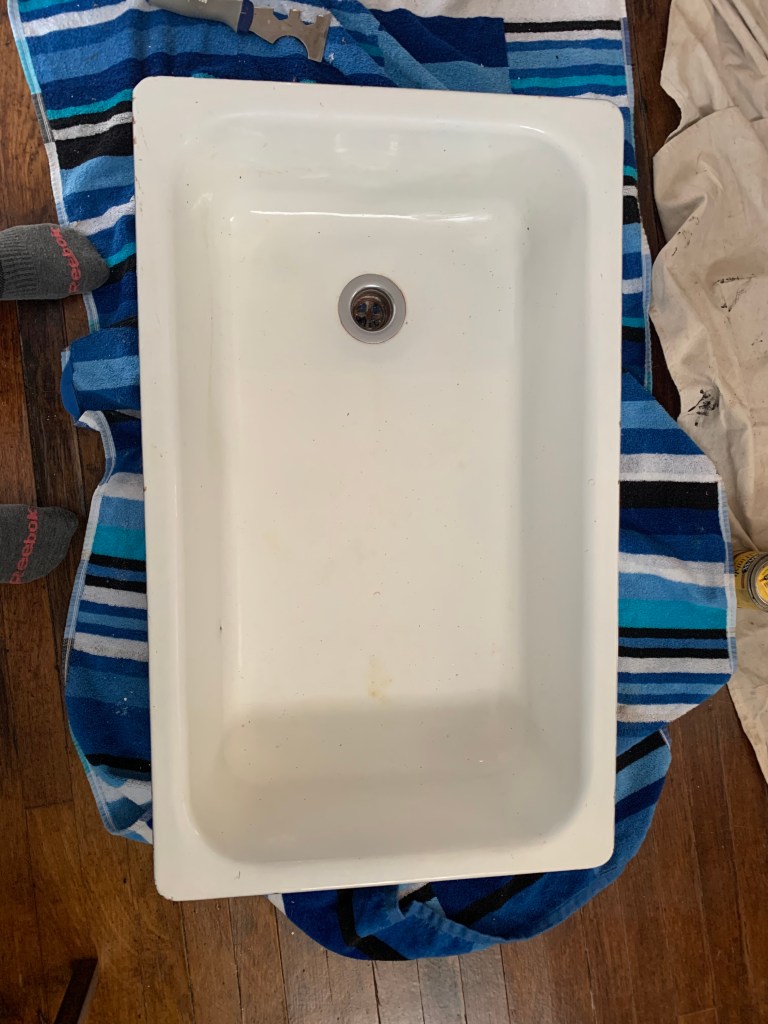
While my husband worked on his projects, I worked on making a vanity. Through my mom, I had acquired a cast iron porcelain sink manufactured on May 21, 1929 so I made that the piece that all other design choices were based around. My mom also had cabinet bases in her shed that she had pulled out of her house while remodeling, so I took one the cabinet bases and it’s laminate countertop and set to work.
I removed the drawers from the cabinet and detached the drawer fronts from the drawers. Those I stained and eventually glued back onto the cabinet with wood glue. The rest of the cabinet I sanded, stained dark, and covered with two coats of poly. I also drilled holes for the plumbing and painted the inside of the cabinet, but that didn’t end up working out for me. The plumbing holes either didn’t work or weren’t where I ended up needing them. We eventually just cutting a good size square in the bottom which ended up working so much easier for our ground level connections. The paint job inside the cabinet got messed up with the plumbing work which I probably could have prevented, but it might have been easier to just paint after installation.
For the countertop, I cut it down to fit the cabinet – although I realized later that I probably should have left it a little longer in the back because there was a gap after installation between the wall and the counter. Then, I laid the sink on top of the counter and traced the edges on to the counter. After this, I measured the lip/edge of the sink and calculated had far in from the traced edge I needed to go. I tried to do a fancy corner, but the sink didn’t fit properly until I had a near perfect square hole. I used a circular saw to cut the hole and an oscillating multi-tool to clean up the edges where needed.
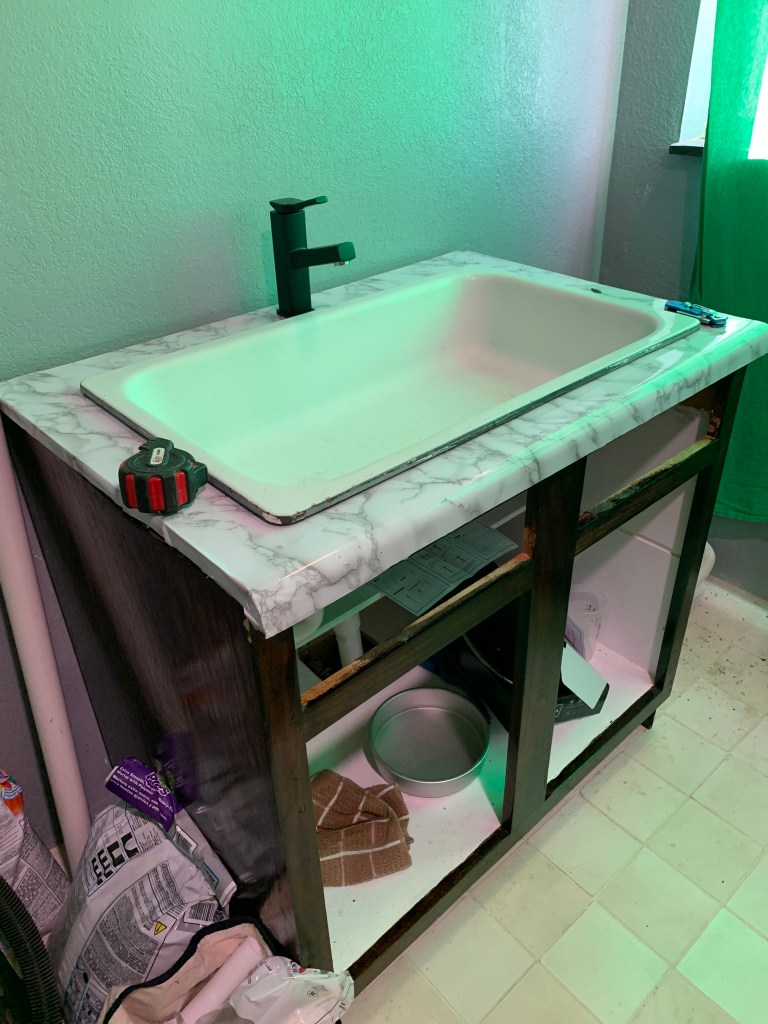
Before installing the sink, I used countertop contact paper to transform the sad laminate to faux marble. I used wood veneer tape on the edges of the countertop to give the paper something to stick to, but I’ve been having trouble getting it to stick there. I tried used silicone caulk to glue down the edges which seems to be kind of working. On the laminate, the contact paper stuck well but did get messed up when placing in the sink. On the side closest to the outside, I ending up removing the paper and re-doing after the sink was installed. To install the sink, I just used silicone caulk on the underside and then added white caulk to the edges after installation.
To take advantage of the large sink, we got a bathroom facet with a sprayer built into the tap. This was an easy install except for the fact that the included sink were too short, Lowes didn’t carry the right kind, and so then I had to find the right kind through Amazon. Once we finally had all the pieces, it was as simple as drill a hole and attaching everything.
The drain was a different story. The sink has a left side drain instead of being centered – it’s old so it’s allow its quirks. We had a light already installed centered over the drain outlet so we installed the vanity centered over the drain and had to figure out how to connect the left sided sink drain to the centered drain connection. I tried one way – it drained too slowly. I tried another – it leaked. A third try – drained too slowed again. A minor adjustment – now the drain leaks. Another adjustment – now it’s slow again.
Eventually, we start questioned if the problem might be further down the drain line – remember, we’ve never had a sink hooked up to this drain connection. Landon figures out the right way to test it and we discover that it is some sort of issue further down the drain line. We get a snake, snake the line, remove parts of the blockage, and hoo ra! The sink drains easily and well!
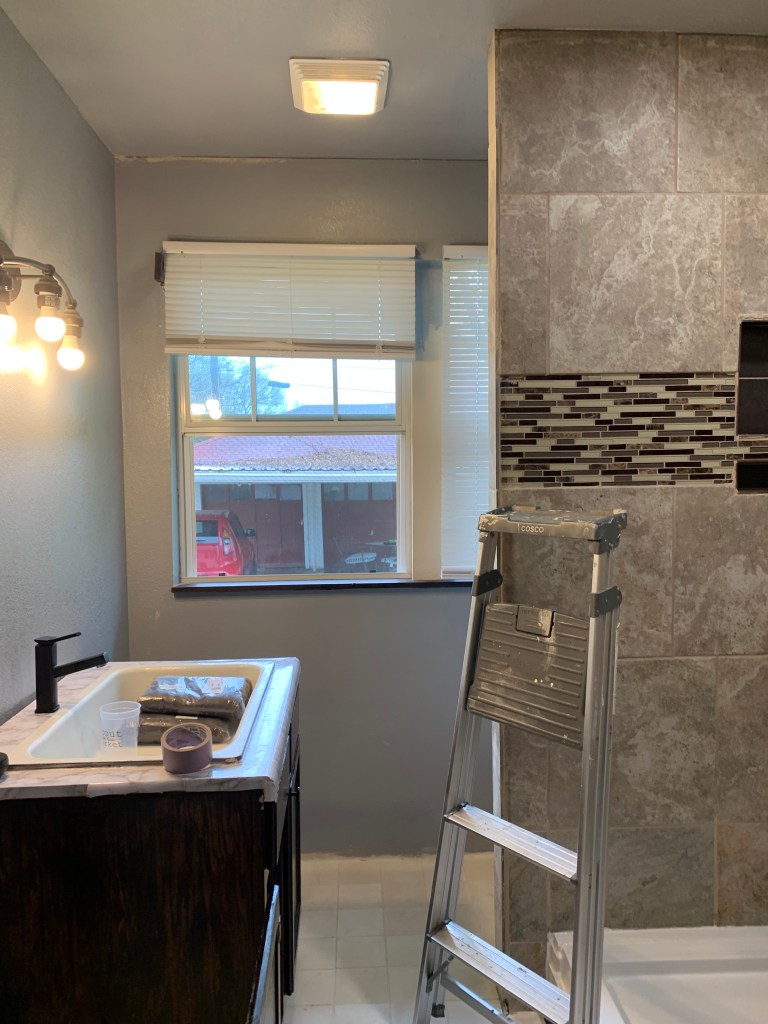
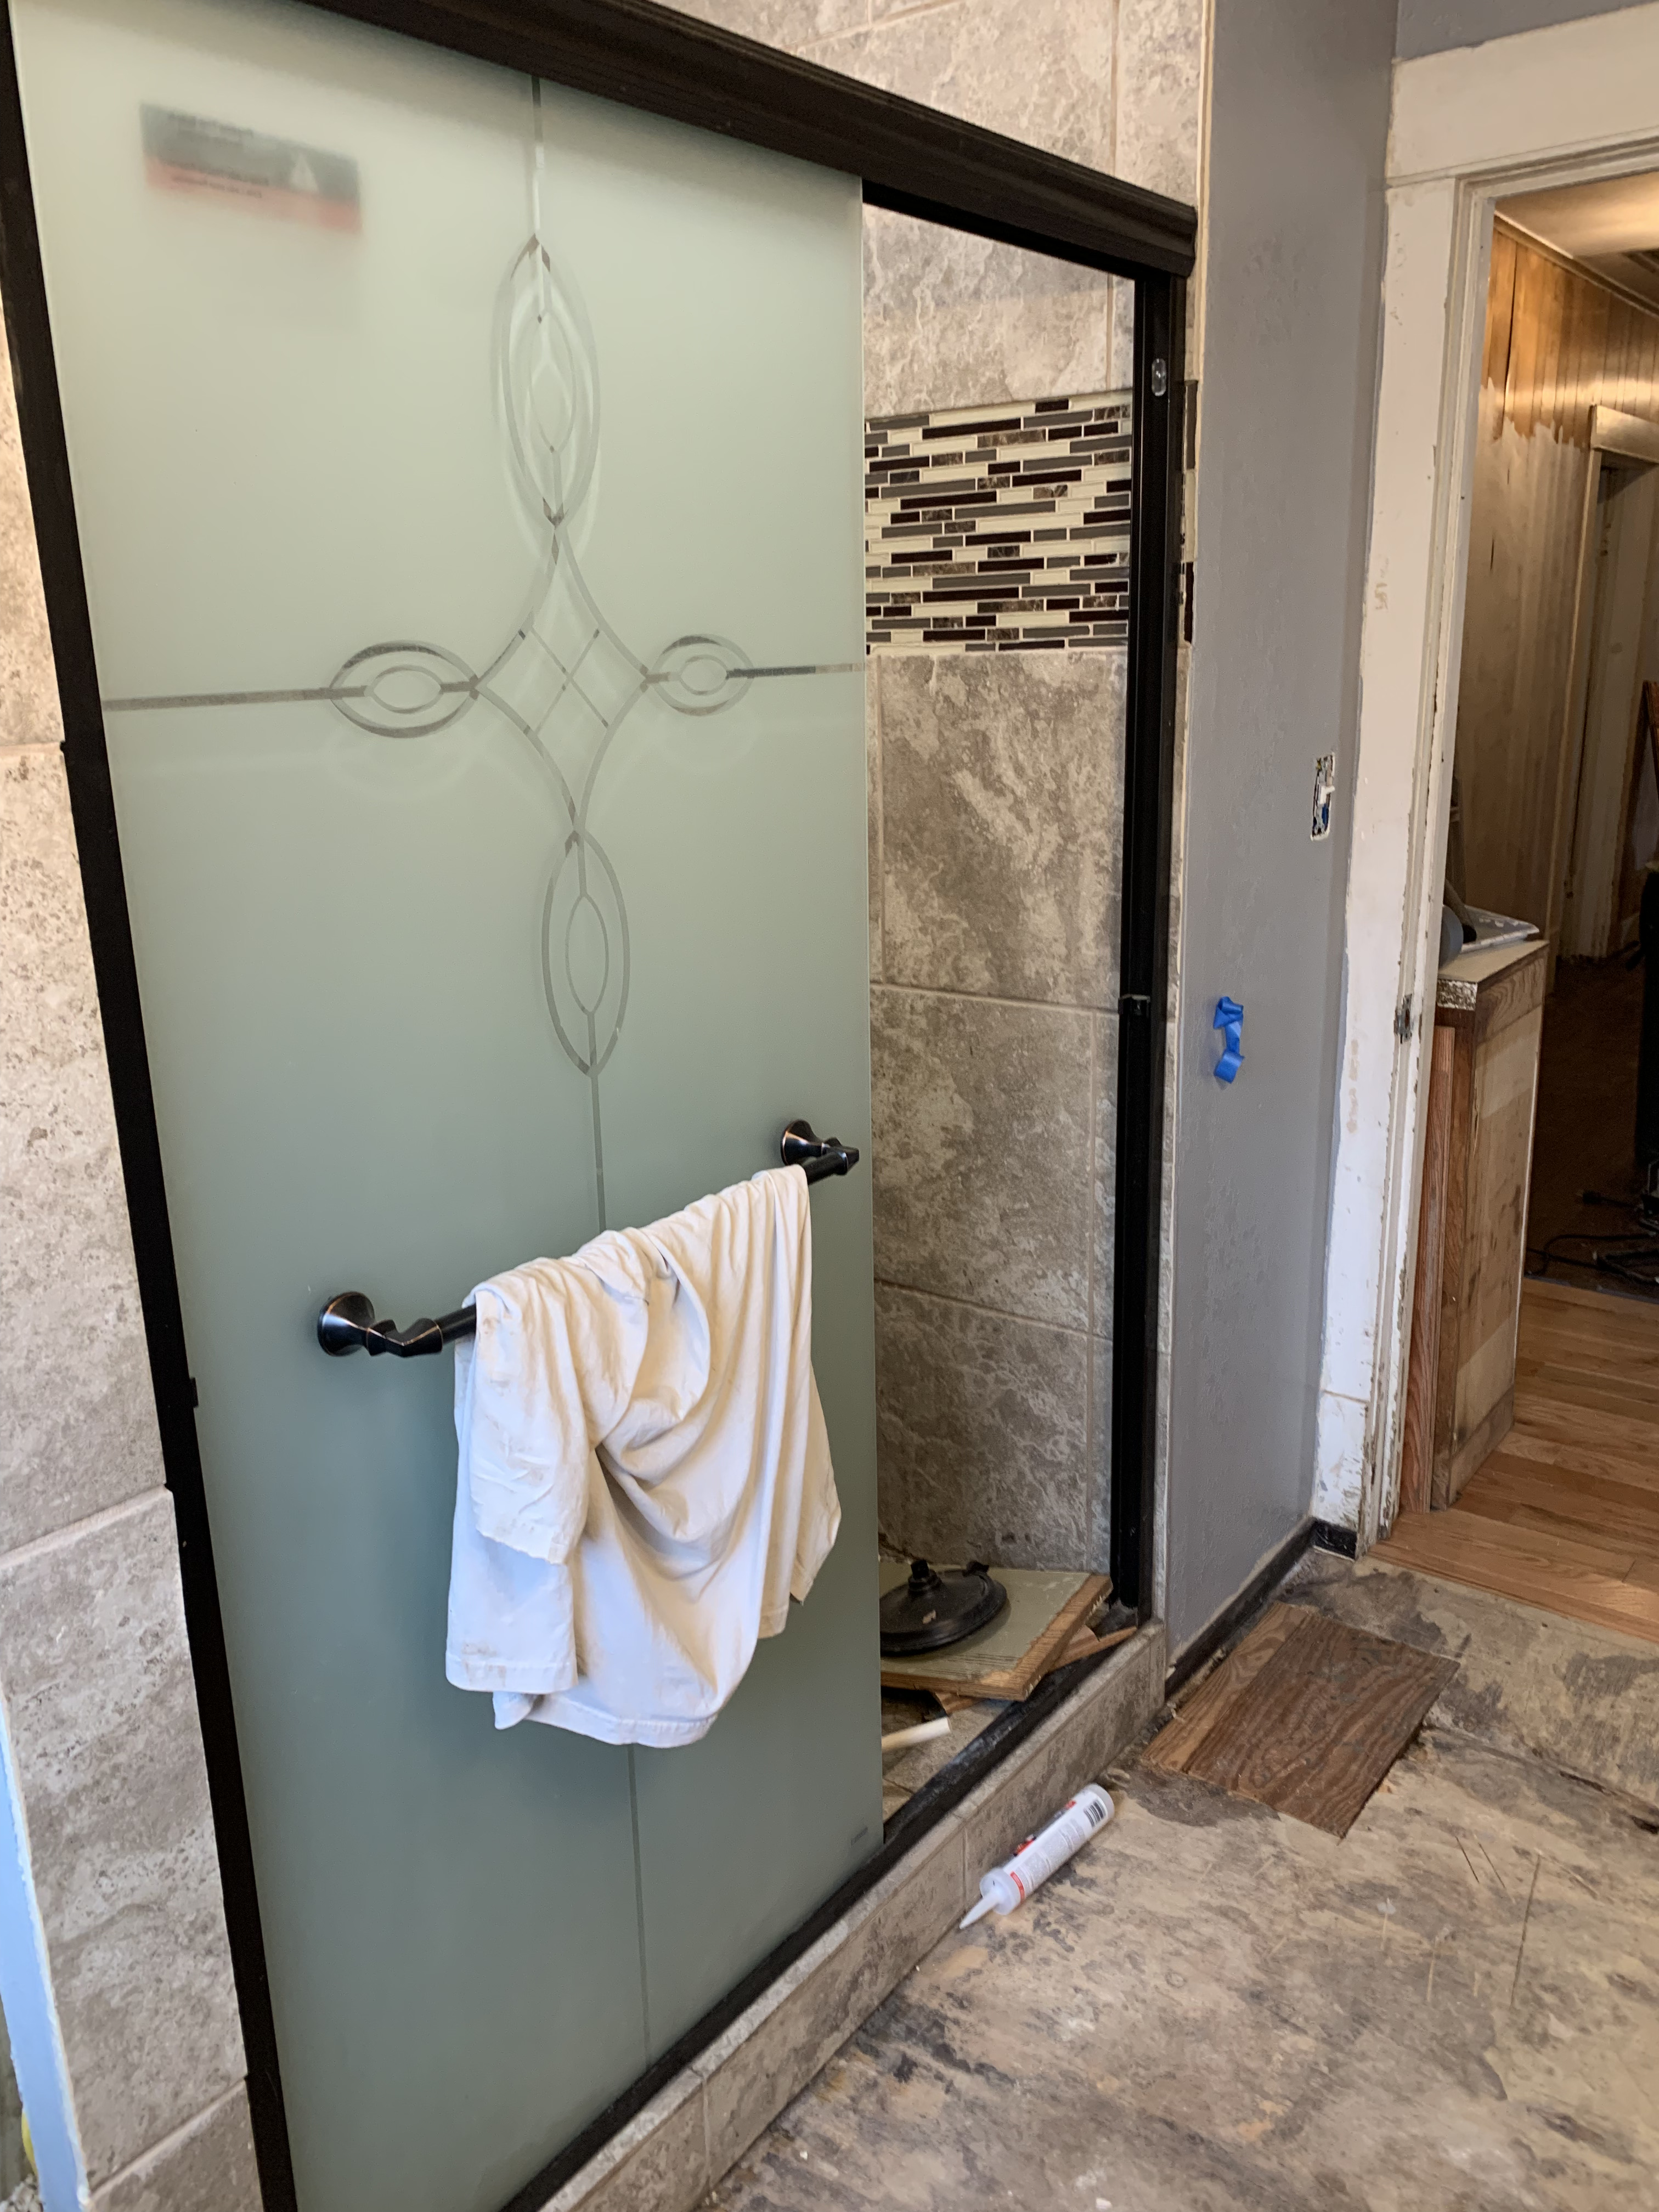
Now, the shower door was been re-installed. The trick to drilling holes into the tile was the rotary hammer drill. We’re missing the rubber plastic bumpers for the glass, but replacements have been ordered from Amazon. The door frame has been caulked. The window blinds and curtains have been hung. A toilet paper holder installed. A mirror was found at Salvation Army for $4, painted, hardware added, and hung up. Shades have been purchased and installed for the light. The bathroom is coming together!
There’s still bits and bobs to finishing out the bathroom, but that probably won’t end even when we start using the room. Honestly, I can’t believe how many words it’s taken me to describe our progress! A lot of this room was function work, not decorative, and I designed it around Landon’s taste – not my own. I’m very excited to see this room come together though, and I’m excited to get to start using it! Once the final touches are in place, I’ll be sharing our after pictures to Instragram @TheHarvey.House – follow to stay up to update with the home reno progress!
